Sunday, December 27, 2015

The Best of 2015 and the Anticipation for 2016

When I saw that Cheryl at Meadow Mist Designs is hosting a Best of 2015 Linky Party, I decided to join in even though I don't have many pictures of quilts to show.   I visited a few blogs on the Linky Party and I was filled with admiration at the beautiful quilts that many of you have done in just one year. 

Reflecting Back:
 
The best part of 2015 was that I finished 12 quilts, 4 pillow covers and 2 tote bags for my book with the AQS.  All of which are my original design.  The worst part was that I couldn't show any of them on my blog.  It has been very difficult to not be able to talk about what I have done from the second half of 2014 to the first quarter of 2015.  It will be a big relief when the time comes and I can post an introduction of my book and show some pictures. 

The sad part of this year was that I lost my dear mother in June.  I went back to Thailand in March to be with her and stayed until the end of May.  I came home just in time to celebrate my daughter's graduation from college and then went back to Thailand a week later for my mother's funeral.  Due to the heavy flight schedules during the summer vacation, I couldn't find a flight home until almost the end of July.   I was glad to be back and tried to pick myself up and continue with what I was doing.  

During that time I was part of the 2015 New Bloggers blog hop.  I had been blogging for about a year at the time, and didn't know much about social media.  It was an eye opening journey and I'm glad I took it.  

Then we went on to the 2015 Fabric-Quilt New Block blog hop, which was a lot of fun.   In that blog hop, I got to design a block and it was picked to be part of the 2016 Quilter's Planner by Stephanie Palmer.  That was super-duper fantastic experience for me.  

All these social media activities had forced me to get out of my comfort zone, to interact with others whom I didn't know.  I used to be happy sewing and making crafts in my little sewing room and shared with my own friends.  These activities had helped me to learn new things and to widen my horizon.  One best thing, among other things, is learning to express my feelings in writing, and in English.  Believe me, it's not easy!   I was taught to be humble and not to brag or even talk about myself.  I learned it the hard way when I came to the US and had to go for job interviews.   People perceived me as not having confidence in what I did just because I didn't boast about myself.  But it's all good.  Everything happens for a reason, right?  Now I just have to be careful not to get carried away.....  :)

I must say I have widened my horizon.  I've got to know more bloggers/quilters who are really nice and willing to share their knowledge with a newbie.  Since then, I've joined two quilter's guilds, two mini groups and a few Facebook quilting groups.  The negative of this is that I have less time to sew for myself, but what I gain is joy in being with people with the same interests.  Next year I'll be better at organizing my time with all these new activities.

2015 was also the year of many firsts for me.  I made my first mini quilt with free motion quilting. 


I loved it so much that I made 3 more mini quilts


I posted my first Handbag tutorial and a free pattern giveaway, which was a lot of fun. 


I also made my very first black quilt.  It's for my VMQG challenge and you can read about it here.


In all, 2015 was a great year.   

Looking Forward:

2016 will be very exciting and interesting year.  I'll be promoting my book.   There will be many coveted giveaway prizes when it's time for the book review.  Check back for more information on what to come next year.  I already have one speaking engagement in April at the Valley Modern Quilt Guild.  This will be my first public speaking related to quilt making.  I'm so looking forward to it. 

It will be the year of more designing and making quilts.  Since I joined the modern quilt guild, I want to try my hand at modern quilt designs.  I love what I've seen so far and can't wait to do some experiments with improv piecing and machine quilting.  In so doing, I hope to post more tutorials to share.

It will be a better year of  blogging and contributing.  I hope to be able to contribute more to the quilting community.  I love what I have experienced so far and I feel that it's just the tip of the iceberg.  There is so much more that we can do as a quilter.  Life is a blessing, especially for me, and it's our duty to share.  It will be a better year of reaching out to the quilting universe.

It will be my second blogging anniversary in February which I'm very happy about.  There will be some giveaways for that too so keep your eyes open for that blog as well.

Thanks Cheryl for hosting this Linky Party.  I'm not much of a list maker as far as goals are concerned.  I pretty much plan what I want to do and just do it.  Now that I have things in writing, I'm more motivated to execute them.


Have a great New Year everyone!!
 
Linking up with Cheryl of Meadow Mist Designs for her Linky Party.  Write your own post for your Best of 2015 and come join the party!

Thursday, December 10, 2015

I'm not ready for Christmas

Ready or not, here it comes.  It's almost Christmas and it's time to put up the tree, the lights and bring out the decorations.  I don't know about you, but I never feel that I'm ready for Christmas.  No matter how well I plan.  There are too many things to do, always.

First thing I like to do is placing a few pillows around the room.  But this year I realized I only have one Christmas pillow left and I may not have time to make new ones.  So, for now, one pillow it is.  I designed this pillow for my local quilt shop two years ago.  We had pillow of the month series and this was pillow number 5.


After putting up the tree and more decorations brought in, the room will look better.  This will be the first year that both of our children are out of school, working and on they own.  They will come to help me put up the tree and decorate it while I cook dinner.  I think that's a neat way to get them to come home, don't you think?

What do you do with your family to get ready for Christmas?


Handbag tutorial


I made this handbag a few weeks ago and posted it on Sewing tote bags and purses Facebook group.  I was asked by many friends and members for the pattern.  Well, I didn't have one.  I started out with a drawing of a basic tote bag shape, and put the design that I wanted on it.   I knew I wanted to make a big bag.   I like roomy bags so I can haul a lot of things with me, especially water bottles.  I want to feel secure that if I ever get lost, I can survive off my bag.  Well, maybe, but I do have a 72-hour emergency kit in the trunk of my car.

When my sister and friends asked for the pattern, I sent them a copy of my drawings and told them how I did it.  This week, I made another bag so that I can write instructions to share.  You can print out the pdf of the drawings here and here.  These drawings are intended to be used as a guideline only.   

Update 9/24/22: Thank you to those who have interest in this tutorial.  Sorry these images are no longer available on google drive.  I've added them to the end of this blog.  If you make the bag, I would love to see the picture of your creations.  If you sell the bag, please give the credit for the pattern back to MY Quilts and Crafts or this post.

I've made some changes in the dimensions for this new bag, after I made the pdf files, because I wanted a little higher but thinner bag.  The point is that you can alter the length, height and width of the bag to your liking.  Here is the new bag.


This is going to be a very lengthy and picture-heavy post.   It's helpful to read the instructions to the end before you start. If you have any questions, please email me to the address below.  I'll be happy to answer any questions.

Materials:

1 yd. bag body cotton ( I used painter drop cloth.  Wash it before cutting )
1 yd. lining cotton
mixed scraps for 1 1/2" x 1 1/4" triangle and 1" square pieces
1 yd. fusible medium weight batting
(2) 19 1/4" heavy weight cotton twill tape for handles
(1) 1/2" decorative button
(1) pair magnetic closures
Chalk marking pencil
Brown thread for top stitching
Matching thread for constructing the bag

Instructions:

1. Cut 3 pieces of bag body and 2 pieces of bag lining.  For this bag, I used the dimensions in the picture below.  Cut 2-inch square notches for bottom.  With 2-inch square notches, you will get a 4-inch wide bag.


2. Use the extra piece of the bag body to cut out (1) outside pocket and (4) handle slot pieces.  The height of the pocket is 12 inches, from the bottom edge, and the handle slot pieces are 7 1/2" x 2 3/8".


3.  Cut 2 fusible batting pieces.  I like to cut them 1/2 inch smaller than the bag body pieces to minimize the bulge.  Fuse them on the wrong side of the bag body pieces.


4. Using chalk pencil, lightly draw a line across the bag body for the flags.  I start and finish the line about 5 inches below the top edge.  Position the flags and pin them in place.


5. Use brown thread to sew the line, catching the top of the flags as you go the first round.  Go back and forth two more times and it doesn't have to be perfect.  Little variant sewing lines make it look more interesting.  On the fourth round, make a detour and sew around each flag.


6.  Now we're going to work on the outside pocket.  Machine baste the top edge 1/4 inch from the edge.  Fold in 3/4 inch from the edge, wrong side together.  Turn in again at the basted line and stitch near the lower folded edge.  Use chalk pencil, lightly draw a line about 2 inches from the top edge.  Position 1 inch square pieces and pin them in place.  Sew them on the same way you sewed the flags.  See picture in step 9.


7. Now we're going to work on the handle slots pieces.  At the short, straight ends, machine baste 1/4 inch from the edge.  Fold in 3/4 inch from the edge, wrong side together.  Turn in again at the basted line and stitch near the lower folded edge. The finished edge is shown using brown thread in the picture below.  Position the handle slot piece on the bag bodies, right side together, two inches from the bag top edge according to the picture below.  Using 1/4 inch seam allowance, sew the handle slot piece onto the bag body.


Flip the handle slot piece over the sewn line and top stitch close to the folded edge.  The raw edges of the handle slot and the top of the bag should match.


Repeat with the other three handle slots.

8. Position the handle between the handle slots and the bag body, match the raw edges at the side of the bag, pin them in place.  The extra 1/4 inch should give a little slack to the handles.  Repeat with the other handle.


9. Position the outside pocket on the other bag body piece with right side facing.  Match all the raw edges and the square notches, pin it in place.  


10. Put two pieces of the bag body, right side together, match all raw edges and the square notches.  Sew both side seams of the bag and the bottom seam with 1/2 inch seam allowance.  Because of the thickness, be careful and go slow when you get to where the handles are, go over them a few times to secure the seams.  Press all the seams open.  It helps to flatten the side seams, with a hammer, where the handles meet.  Keep the seams open while you pound them down and watch out for your fingers.  Match the side seams and the bottom seam, sew the square notch close. 


11. Now we're going to put the bag lining together.  With right side together, sew the side seams and the bottom seam using 1/2 inch seam allowance.  Leave about 4 inches opening at the bottom seam for turning.  Because I have a big outside pocket, I didn't make any inside pocket on the lining.

12. Slip the bag into the lining, right side together, match the side seams and pin them in place.


Sew the top edge together, using 1/2 inch seam allowance.  Keep the handles out of the way while sewing.  Turn the bag inside out through the opening in the lining.  If the side seams still feel thick, pound them down some more with the hammer.  Put some scrap fabric over and under the area to protect the bag before pounding it with a hammer.  Using hot iron, press the bag opening real well, make sure that the lining lays flat behind the bag body.  You can top stitch the whole bag opening if you like.  I didn't because it's too thick for my machine.  I only top stitched on the area between the handle slots where I'm going to put the magnetic closures.

13. Now it's time to put the magnetic closures on.  Find center point of the bag opening, mark it with a pin on the lining.  Cut two 1 1/2 inch pieces of fusible batting remnants.  Through the opening, position one piece of fusible batting to the wrong side of bag lining where marked, fuse it in place.  Repeat with the other piece on the other side.  On the right side of lining, follow the manufacturer instruction and put the magnetic closures on.  


You don't have to do this, but I like to put a little fabric glue on the back of the fusible batting behind the magnetic piece to glue it down to the batting on the bag body.  Put wonder clips on to hold them in place and let dry over night.  It's just a little step to make sure that everything is in its place.  It's a little crampy because you have to do this step through a small lining opening.

14. Hand sew the button on the outside pocket.  You can put it any where you want.  I'm using this to divide the pocket in half so I put it right in the middle.


15. Sew the lining opening close and your bag is done!

I hope the instructions are not too confusing for you.  If you have any questions, please email me at Craftheaven09@gmail.com.  Thanks for visiting my blog.  I hope you'll come back and leave me some comments and share your version of the bag.


Have a fun sewing week!!


Wednesday, November 25, 2015

WIP this week.

Our Valley Modern Quilt Guild has a new challenge, fire, for November.  So in the past week, I was thinking about this topic and wanted to make a big black quilt.  We went camping almost every summer when our children were young.  We camped all over Northern California, Oregon, Wyoming, Montana and Utah.  There are so many fond memories along the way and I wanted to express those feelings on a quilt.  Our favorite thing was sitting around a campfire after dinner and talked the night away.  One summer we were at Timothy Lake in Oregon.  Right after a hearty breakfast, we went hiking.  We missed the trail marks, took a wrong turn, and ended up hiking all around the lake which took almost all day.  We ate delicious wild raspberries for lunch.  We were very tired that day and went to bed right after our simple dinner.  We slept so well that night.

I love campfires and want to design a quilt that reminds me of the good time we had.  First, I drew the design in my design book, and then transferred it to the fabric.  I hung my quilt top on a design wall in my sewing room and started putting some strips of fabric on it to audition the colors. 


Here is the finished quilt.


What is your favorite thing to do with your family?  Do you long to express your fondest memories onto a quilt?  

Wherever you are, I hope you're having a great time with your family.  Make memories that will last a life time together. 

Have a great Thanksgiving!

Friday, November 13, 2015

My new bags, part two


Hi There,

Last week I made some bags and I was having so much fun that I ended up making four of them.  I talked about the first two bags last week, you can read about them here.  I finished the last two yesterday and here is the third bag. 


You can't tell from the picture that the handles are navy blue. I have had these blue leather handles for sometime, but couldn't find a place to use them until now. I think they match the border of the crazy quilt block that I appliqued on the front really well. I hope you can see the interior, I have a loop to hang a key chain. I like that because I always have to dig out my keys when I need them. Having a place to hang them, I know exactly where they are. I put the loop in with the side seam of the lining. I also made a roomy inside pocket for my big phone too.


I used left over triangles from the other bag to decorate the pocket and purposely made the design asymmetrical just for fun.  Sometimes I was so obsessed with being perfect in sewing 1/4" seam, in placing my blocks and other things quilting related, so much that crooked things bothered me.  I think it's because of all those years of doing auto/furniture upholstery.  There is a lot of top stitching in auto upholstery and crooked lines are not tolerated.  We had to make every seam and every line perfect.  Now I can't help but examine the seams of car interiors, or pieces of furniture.  I will never buy anything that has a crooked seam.  I know it's weird, but that's me.  All in all I have to thank my upholstery teacher who trained me so well and gave me the foundation that I can apply to quilting.  Do you have this obsession?  Do crooked seams bother you?  

My last bag for this week is another tote bag.  I decided to piece the front of the bag using a crazy quilt block.  The front has a simple and minimalist look which I like.


I liked the idea of a key chain loop, so I put it in this bag too.  This time I sewed it on at the bag opening.  I want to see how this would work compare to the loop sewn to the side of the lining.

This break has been good for me.  I'm very happy with the way all the bags turned out.  I'll put two of them in my yearly Holiday boutique along with the other bags that I already had, and I plan to give away couple of them as gifts.  I found that while I was taking a break and worked on different things, my mind was more relaxed.  Now I'm ready to continue with what I was working on. 

Have a fun and productive week!

Friday, November 6, 2015

My new blog name


Welcome to my new social media home.  I've changed my blog name to MY quilts and crafts.  I hope everything will go smoothly and that all my friends and readers will be able to connect to this new site with no problem.  If there is any problem, please email me at craftheaven09@gmail.com.  

Have a great week!

Link to my newest post:

My new bags, part one

http://myquiltsandcrafts.blogspot.com/

My new bags, part one

I took a break from quilting to make some market tote bags.  I love making bags of all kinds; handbags, tote bags and clutches.  Once in a while I would get a special order to make a custom bag for someone which was really fun for me.  It's a nice break.  

I have been making black and white EPP hexagon pieces since Summer.  Since then I've tried to use them in many projects such as decorating t-shirts for my nieces, and I even made a key chain with them.  I'll share that another time.  Now I found another perfect application for them.  Here it is...

The Hexie market tote


I made my own pattern. The dimensions of the Hexie market tote are 18"x 16" x 3".  This bag is very deep to accommodate all the vegetables and goodies that I'll be getting from farmer markets.  I decided to put a small pocket for keys and wallet at the top for easy access.  The small pocket is made of faux leather which has a nice look and feel of leather.  I also hand stitched the leather handles for extra security.  To the front, I added hand stitched details and cute little wooden buttons to the hexies.  These are the closed up pictures.


The second market tote I made is a little smaller.  The overall dimensions are 18" x 14" x 5".  I made different handles for this one to make it washable. 

The front of the second market tote

I've seen quilts made with triangles in the design and always adored them.  So, naturally, I chose triangles to decorate my bag.  I didn't make small inside pocket for this one because I wanted to do something different.  I added an outside pocket and appliqued some 1" fabric squares on it.  I have postage print fabric that has cute stamp prints on it, so I fussy cut the stamps out.  It turned out so cute!!  The back looks as good as the front, if I may say so myself.  I got 2 bags in one, well, almost.  Then I divided the pocket into 2 sections with a silver button in the middle.  These pockets are so roomy that I can put a tablet in them.  Now I have a place to put my giant phone so I don't have to carry it in my hand.  These new smart phones, they are so great for a lot of things and they could almost replace my laptop but they're so annoying to take along when I don't want to carry a purse with me.

The other front of the second market tote

I have so much fun making these two bags, so I started two more.  I'll post them after I finish.

I found that taking a break to do different projects helps me with my design process.  I was stuck in designing a new quilt so I stopped and made these bags.  Are you the same way?  What do you do when you're trying to find a solution for your problems?  I think making some new bags is my perfect therapy.  :)

Have a perfect week!

Friday, October 23, 2015

New mini quilts

In my previous post, I mentioned our Valley Modern Quilt Guild challenge. We are supposed to make a piece inspired by water. The piece should reflect the modern aesthetic and may be any size. I had made 2 mini quilts using my Faux Rag technique.   Here are the pictures of the quilts.
   
                                  
You can read about these two quilts here.   Although I liked both of these minis, I think something is missing and they are not quite what the challenge is about.  I love the Faux Rag technique but I don't think it is right for the size that I decided to make.  I didn't have time to make a big quilt for this challenge and the Faux Rag technique is better for bigger size quilts.

So I decided to make another mini quilt with a different design and technique.  Here is the picture of the finished quilt.


This quilt conveys much better feelings and gives the modern aesthetic that they are asking for in the challenge.  I love the overall color and I can just feel the cold chill from the rain. 

Mini quilts are great.  They are fun and fast to make.  I'd love to hear what you think about these three mini quilts.  Do you feel the same way?  What process do you go through when you design a quilt? 

Have a blessed week!!


Tuesday, October 20, 2015

The 2016 Quilter's Planner is here

Today I would like to shout out for my friend Stephanie Palmer from the Late Night Quilter. Stephanie is an excellent professional long arm quilter, a great mom, a talented quilt designer and a prolific blogger.  Not only that she gets it all done, she's done it all very well.

Last August I had an opportunity to participate in a really fun blog hop called 'Fabri-Quilt New Block Blog Hop 2015'.  In that hop, I participated with over 60 other bloggers to create an original block design and post a tutorial on our blogs.  You can read about my block design here.  Then we could enter our block to be part of the 2016 Quilter's Planner, if we wanted to.  I entered my block, and it was chosen to be featured in one of the weekly calendars.  It is such an honor to be a part of this project along with other talented bloggers and designers whom I've come to know.  There will also be fantastic quilt patterns from top designers like Pat Sloan, Amy Garro, Yvonne Fuchs, Cheryl Brickey and Stephanie Palmer, just to name a few.

As I get more involved in many different activities like church, volunteering, quilter's guilds, blogging, publishing a book and the list goes on and on, I find it harder to keep track of everything through my phone or tablet.  I always have this fear that if I lose my phone or tablet, all my information will be all gone.  Having a backup is a good thing as I often tell myself.  I found it helps to jot down all the things I need to do.  This planner is really a cool thing not only for quilters, but for all of us. It has just about everything you'd need to inspire and help you to plan your days, weeks and months.  I also love the fact that it has a place for me to doodle some new ideas for my quilt designs.  Who knows? They might end up in my next book.  I can't list all the great things it contains, but if you go to the link here, you can read all about it and will have a chance to receive a free PDF of the Project Planning Page as well.  Click on the image below and order your copy today. I'll be getting one for myself.

2016 Quilter's Planner


Have a great week!

Friday, October 16, 2015

A New Modern Quilt Guild


We just got a brand new Modern Quilt Guild!!  It started off with a few quilter friends got together to sew and decided to form a Valley Modern Quilt Guild in the San Fernando Valley of the greater Los Angeles area.    Scott Griffin is the president of the guild.  You can read about this new exciting event in his blog here. 

These quilters are all seasoned and excellent quilters.  I'm honored to be included into this group and looking forward to contribute to the guild in any way I can.  I was asked to help with the monthly challenge which I'm happily accepted even though it means I have to step out of my comfort zone.  I'll do my best.  Our challenge for the October meeting is to make a piece inspired by water.  The piece should reflect the modern aesthetic and may be any size.  You can check out the Valley Modern Quilt Guild website here.

I decided to make a mini quilt, about 18"x20", for the challenge and I'm going to use the Faux Rag quilting technique.  What is Faux Rag Quilting technique?  For those of you who's reading my blog for the first time, it's a new twist on a traditional Rag quilt technique.  I came up with this idea a few years ago.  The AQS is publishing a book of this technique and it's scheduled to come out in March 2016.  I'll be talking more about it in the near future.  I'm planing a lot of fun things to do for the book release.  There will be prize giveaways and hopefully a blog hop for the book review.  I'm very excited about this book and I think quilters who love rag quilts will love this Faux Rag Quilting book.

When I thought about the design for the challenge, several thoughts came to mind about water.  Top of the list are rain and ocean.  I thought of rain because we are having a drought here in California.  Our water supply is at the critical level and it's more urgent than ever for us to conserve water.  We have many beautiful beaches here in California, thus came the ocean idea.


More rain, please mini quilt

After I finished the first quilt, I decided to made another quilt. 


Summer Waves mini quilt

I still have about 2 weeks before the meeting to work on these two ideas.  

What is your designing process?  Do you actually make a sample of your design?  

Have a great week!

Wednesday, September 23, 2015

I was liberated from pins

I have been making quilts for sometimes now and I'm a vivid pinner.  I pinned everything before I sewed to make sure that all points meet at the right place, and that took a lot of time.  I even pinned jelly roll strips together before sewing.  I was that bad!

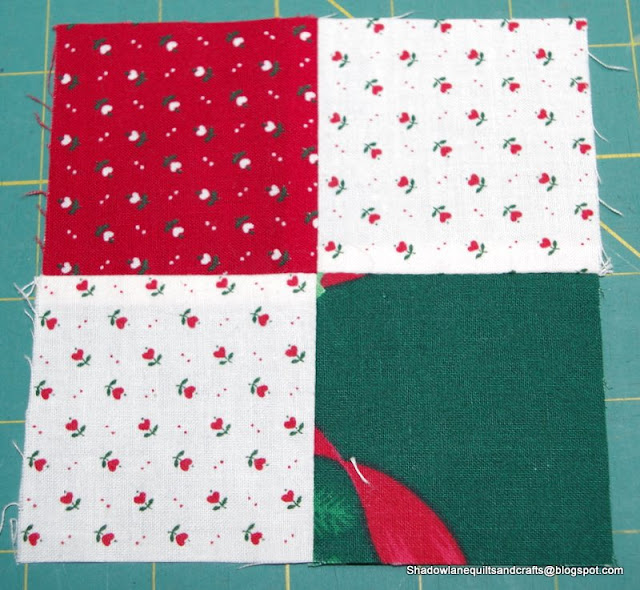
Two weeks ago I decided to take a quilting class at my local community college.  I didn't know the teacher or anything about the class.  In the first class, the teacher showed us what we're going to be learning; how to cut with rotary cutter, how to sew scant quarter inch seam, half square triangle, four patch, skinny border...etc.  I thought this was going to be very basic and boring but I stayed put and listened on with an open mind.  Then the teacher showed us how she sewed a four-patch square together without pinning.  No pinning?  I was blown away at the thought of not using any pin.  I moved closer to her table so I could observe her technique.  She also showed us what she called 'swirl the seams' to reduce bulk in the middle.  Last night I took her tips to a test and sewed these squares.  I almost jumped up and down with glee when I saw the result.  The four-patch squares came out perfect without pinning.  On top of that, I sewed 16 of these squares in less time than it used to take me.


The piece on the left is what I used to do; ironed the seam to one side.  The piece on the right is what I'm doing now.  Opening up the seam in the middle reduces the bulk and the square lays flat.  Then, I put them together into this.  


We have to make 3 of this block for our first assignment - a table runner.  Well, to sew this big block, I pinned a little just to keep things in place.  I don't know if I would ever be totally freed from pinning, but for now I can say that I was liberated.  Thanks to my teacher, Rita.  I'm so glad I came to this class and I think it's going to be a very interesting and fun class.  Rita said she had all kind of tricks she could show us.  I can't wait!

What fun class have you taken lately?  Do you learn anything new?  I love to read all your comments and thanks for visiting.   Have a blessed week!!


Thursday, September 10, 2015

Took time off from sewing to organize my stash

I have been wanting to reorganize my fabric stash, but couldn't decide on how I wanted to do it.  I've heard about comic book boards, but I chose not to use them.  I want to use what I have without buying any more stuff.   I tried to fold my fabric and store them by color, but my shelves looked messy because my fabric bundles were in different width.  So I decided to use a 6" x 24" ruler to fold all fabric that is more than 1/2 yard.  Any piece that's less than 1/2 yard, goes to scrap bin.  By using the ruler, I will get them all in uniform 6" wide.

Majority of my stash is flannels and they take a lot of room on the shelves.  They are stacked up all the way to the ceiling.  The bungee cords are there to stop them from falling down in case of an earthquake.  I somewhat had them by color but they were all over the place.  Not only it was a hassle to get the piece that I wanted out, it was more hassle to put it back where it belonged.  So I tackled them first.  I took down one section of the shelves and started folding, then I remembered the camera.  Hence the empty spot on the shelf.  Here is the before picture.


This is how I fold the fabric: 

1. Put the fabric on a table with the salvage on my right and the folded edge on the left.  Place the ruler across the fabric as in the picture.


2. Fold the end over the ruler and continue to fold until I reach the other end of the piece.


3. Slide the ruler off the fabric and fold it in half along the long side.  Check out the stack in the top right corner of the picture.


 Here is the after picture.


It looks much better, I think.  Now I can clearly see the color of each bundle.  I still have the top shelves to take care of, but I'm happy with the result so far.  Now I can fit most of my flannels in one shelf and the quilting cotton in the other.  In the process, I found a lot of fabric that I bought long, long time ago before I knew anything about quilting cotton.  I'm deciding whether I should donate them, or try to find a way to use them.  I'm leaning toward the first choice just because I'm trying to minimize the clutter.

How do you organize your stash and your sewing room?  Do you keep all your fabric, even the one that you don't care for any more?

Stay cool and have a blessed week!